Adobe, I need your help.
I finally decided which of the new breed of mirrorless cameras to buy. I’ve been looking for almost a year, and since April I’ve rented and tested four of the most interesting mirrorless cameras on the market: the Sony NEX-7, Fujifilm X100, Fujifilm X-Pro1, and Olympus OM-D E-M5. The choice was difficult but I finally settled on the X-Pro1’s recently announced little brother, the X-E1, which shares the sensor, lenses, and processor of the larger camera.
I came to this decision after a couple of nights spent taking a hard look at the photographs from each of these cameras. While I liked the results from the Sony and Olympus cameras a lot, the results I got from the Fuji X-Pro1 were the best to my eye. It doesn’t hurt that Fuji has the best lens roadmap of the bunch.
But the Fuji camera also has a crippling flaw. Although Adobe Lightroom can technically read raw frames from the X-Pro1, it does a terrible job.
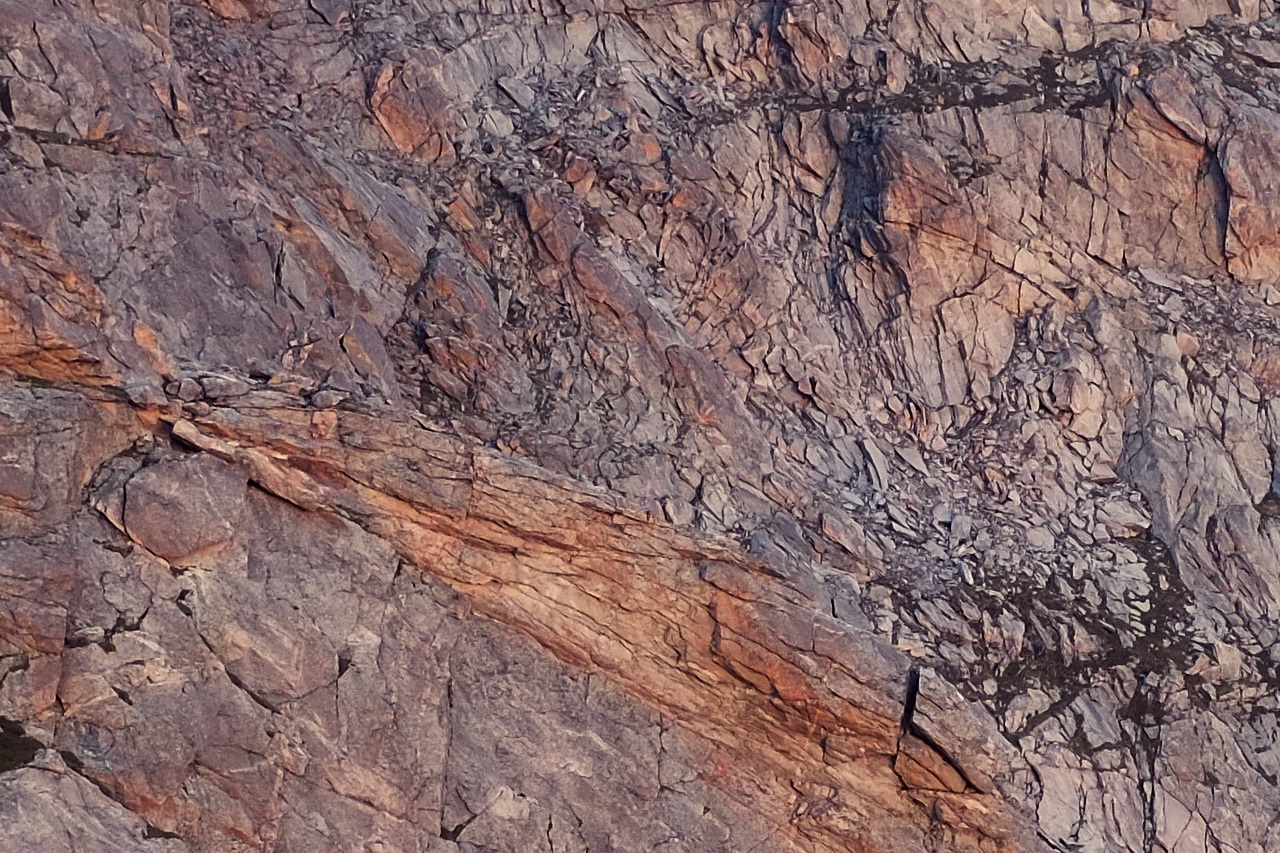
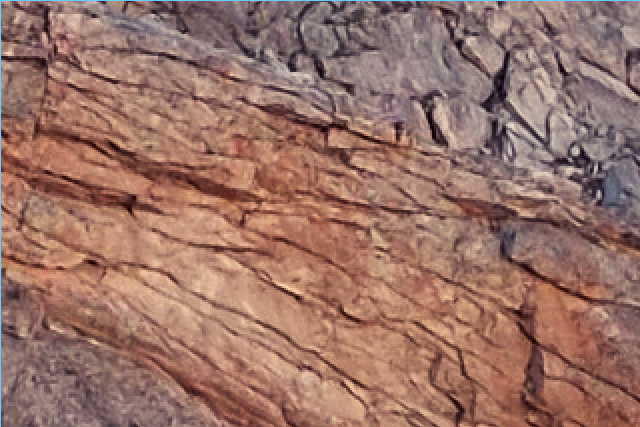
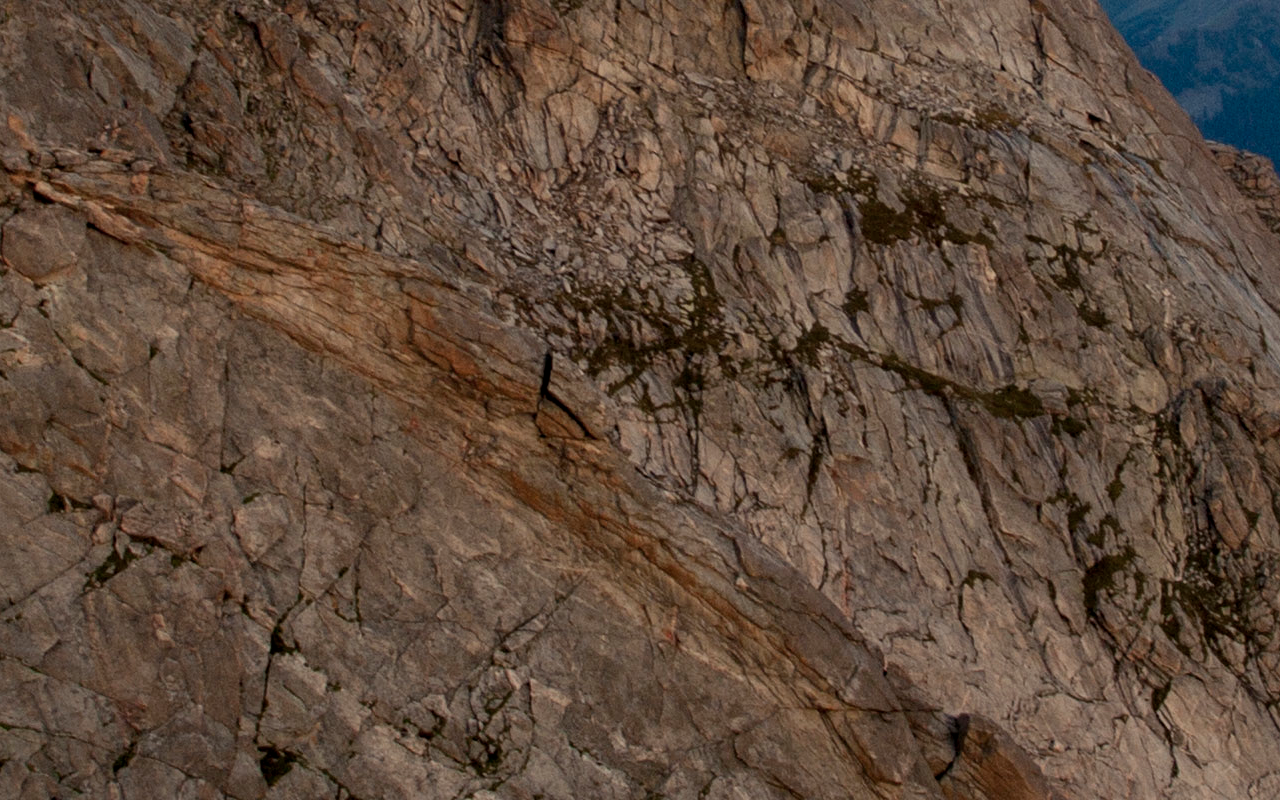
This wasn’t immediately apparent when I started working on photos from the X-Pro1. They looked excellent, with great color and image quality. But after a trip up Mount Evans that included a lot of rocks and foliage with fine detail and small patterns, I noticed a very strange look to the images at full pixel resolution. The best words I could come up with were “painted” and “smeary”.
This can be clearly seen in the full-size crop of a recent shot. The rocks look smooth and angular, like Bob Ross painted them with careful strokes of a knife; not at all real at this scale. At smaller sizes you can’t see this, but for large viewing or printing it is very apparent.
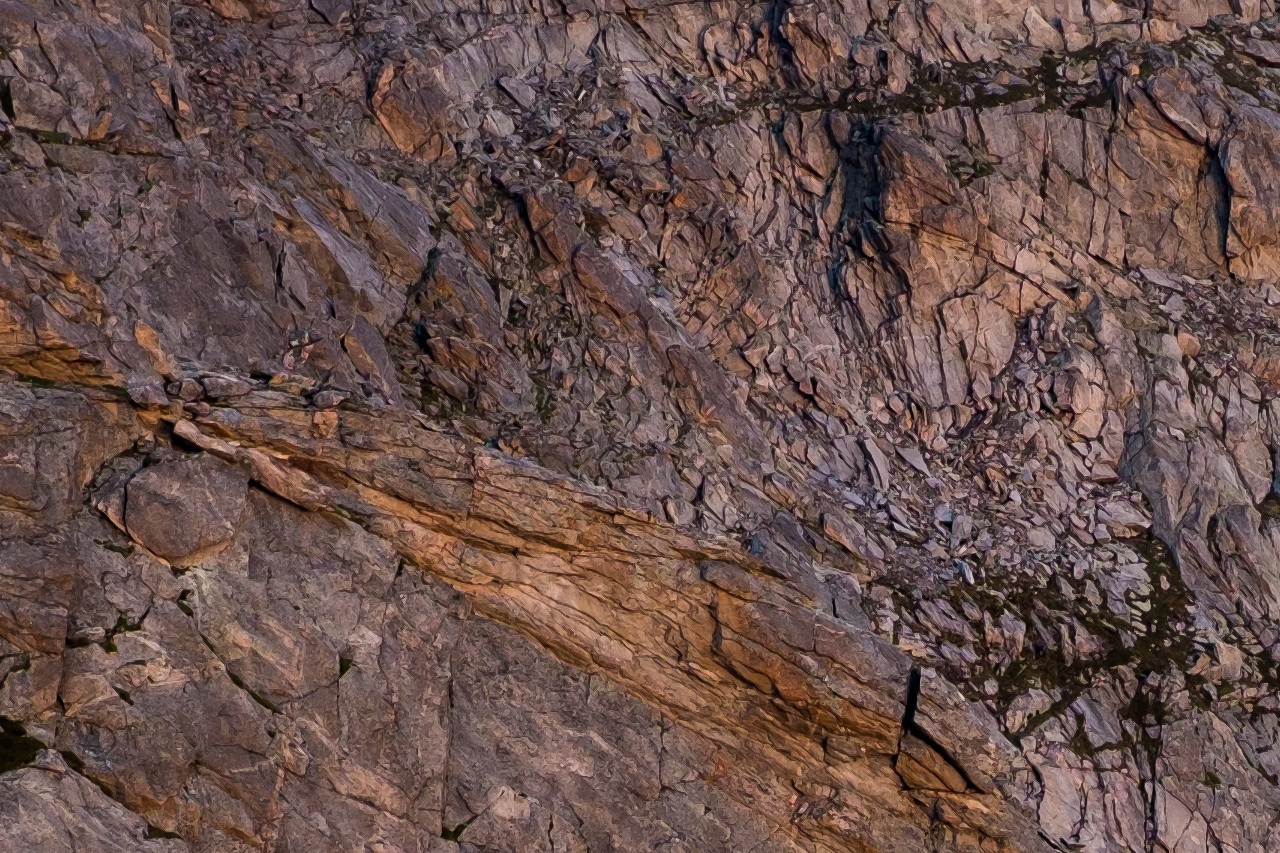
The JPEGs out of the camera didn’t exhibit this. They show some smoothing but nothing like what Adobe is producing. It is not some inherent problem with the camera or the sensor layout.
Since I mostly shoot raw, and rely on Lightroom for my photo management and raw processing, this is a real problem.
It starts with the unusual layout of the Fuji’s sensor. The X-Pro1 and X-E1 don’t use a simple Bayer pattern sensor which almost every single digital camera on the market uses. Instead, Fuji went with a highly modified sensor layout they called X-Trans. The reasoning and concept behind this make sense on the surface, but the end result of this unusual array is that most raw processors, including Adobe’s, suck at demosaicing the data. If they even support it at all. The well tested Bayer algorithms don’t work, and developing new ones for this sensor is apparently a hard problem involving more difficult math.
Several raw processors have even stated they won’t support the camera at all, or that it will be hard to do so and they have no timeline. I understand that they want to support more the common cameras first, but if selling raw processors is your business then it is also your business to support unusual cameras in addition to the common ones.
Adobe, probably the leader in the raw photo software world with Adobe Camera Raw and Adobe Lightroom, does support the X-Pro1 (and will presumably support the X-E1), but it does not do so well.
I decided to buy the X-E1 anyways, but this problem bothered me. Was this going to stop me from being able to get the most out of this camera? Should I give up on the camera I wanted because the software had trouble with the hardware? The JPEGs are so good that in the short-term I can use them, no problem. But there are some photographs, like the example I’m using here, that really need the extra data in the raw file to get the best final result. In weirdly lit cases like this I need all the extra headroom I can get.
Lightroom did a fine job with the scene and with recovering the blown highlights (not shown in these crops), but it did a poor job at resolving fine detail. What about Fuji’s processor?
Fuji supplies a raw file converter with an engine based on SilkyPix, a japanese raw processing studio that makes very little sense to me. The translations are really bad, and the interface is confusing. But Fuji worked with SilkyPix up to the release of the X-Pro1 so that it would be able to process the raw files, and is generally considered the reference raw processor for this camera.
It’s much more difficult to use than Lightroom. I wouldn’t want this converter to be my permanent solution, but it works. I processed the same photo using the Fuji converter and tried to duplicate most of the processing settings from my original work to get a similar look. I didn’t spend much time matching them perfectly, but the comparison is telling. Adobe’s processor (shown above) is failing to retain fine detail and introducing false colors.

The results are easier to see at higher magnifications. Here are 2x crops from Lightroom, SilkyPix, and out of the camera, in that order.
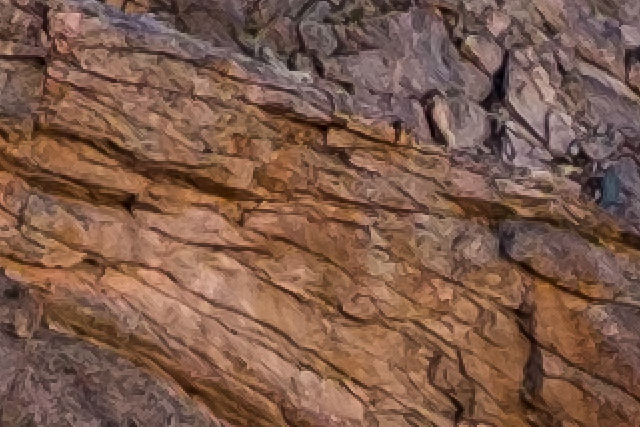
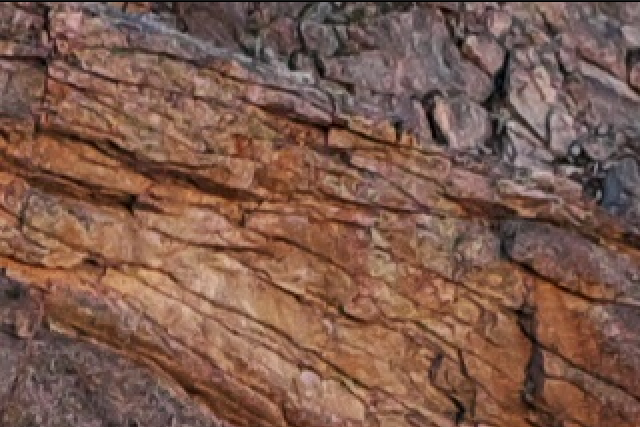
So, as discussed, Lightroom really struggles here. The result is smooth but it definitely does not look realistic. The SilkyPix conversion on the other hand looks like actual rocks. It also clearly resolves more detail from the same input data. But the software is a pain to use.
This gives me hope though, because turning a raw file into an image is basically a math problem. If one developer can solve that problem then so can another. But it does mean that right now Lightroom is basically useless for the camera I just ordered. And that’s really too bad.
For now the plan is to keep using Lightroom, but only for basic photo management. I’ll shoot raw+jpeg, and use the jpegs for most things. I’ll process individual raw files in the SilkyPix converter when I need to get the most out of the data, but otherwise mostly just hold onto the raw files in the hope of some future Lightroom update where they fix the processing problem.
It’s definitely not ideal, and I wonder if I’m just getting myself into trouble by not choosing a more conventional camera. But find me a more conventional camera this size, with lenses this good, actual traditional controls, and image quality this high for a price like this[1].
Adobe, I need your help. Bribe Fuji if you have to. Charge me for an update. Buy SilkyPix and steal their processing engine. Just get this working.
— Steve
- I did get a picture of the same rock face from a similar position with my older Olympus E-410 and an equivalent focal length lens. I was a little farther away, but it definitely resolves less detail than the newer Fuji, and has more noise.↩︎

