![]()
Interior bike rack for a 2012 Ford Focus hatchback
The best way to carry a bike?
I want to be able to carry a bike in my car. Both so I can have my bike with me on road trips and to try new trails outside my normal riding distance from home.
The obvious way to mount a bike on a car is to put it on a rack the roof. Turns out1 it’s also not a great solution for reasons I’ll get into. Other common options are hitch carriers and trunk lid mounts. I can’t abide trunk lid mounts, and I don’t plan to install a trailer hitch on my car. And though I’ve had a roof rack in the past, I don’t have anything that will fit my Ford. I’d need to buy new towers, cross rails, and bike mounts. That’s expensive.
Roof racks have other disadvantages. Bikes on the roof reduce gas mileage on road trips and expose the bike to potential damage. You have to be careful about parking garages, and you have to get locking fork mounts if you plan to leave your bike with the car while doing other things. In contrast, mounting the bike inside the car preserves gas mileage, protects the bike, keeps the exterior appearance of the car stock, and lets you keep a bike with you while doing other things with less worry about theft2.
For these reasons I’d prefer to mount the bike inside the car. In fact, part of my selection process for purchasing a car included a requirement that I be able to easily place a bicycle inside the car. Ideally with minimal to no disassembly required. This was part of the reason I eliminated all sedans from my list and focused on hatchbacks and wagons.
Rack ideas
Although I wasn’t as comprehensive in testing this as my friend Andy3, I was certain that the Ford Focus would accept a bike and meet my criteria. I just didn’t work out a good solution until after spending some real quality time with the car. Things started to click after my recent Iowa vacation, when I got a good look at the custom racks Andy built for his Edge, his wife’s XTerra, and my dad’s Nissan Frontier.
Andy can carry two bikes upright in a set of Rocky Mounts mounted on stubby Thule cross rails. He folds half the rear seat of his Ford down and the carrier assembly is held in place by bungee cords. Simple, relatively inexpensive, and allows him to easily carry three people and two bikes. His wife’s XTerra is similar, but can carry three bikes with the back seat folded flat. It uses a set of truck bed mount style fork blocks in a custom rack. Between them then that’s five bikes and five people in two vehicles. Nice.
My dad’s rack is a simple folding wooden frame, custom sized for the bed of the pickup, with two simple fork mounts bolted to the frame. That and the ribbed pickup bed are all it takes to securely hold a bike in place. It is designed to carry two bikes, and can take three in a pinch, with the front wheels either in the bed of the truck or behind the seats in the cab.
I wanted to do something similar for my Focus, despite its smaller size, and these existing mounts were a good starting place for my design.
Test fitting
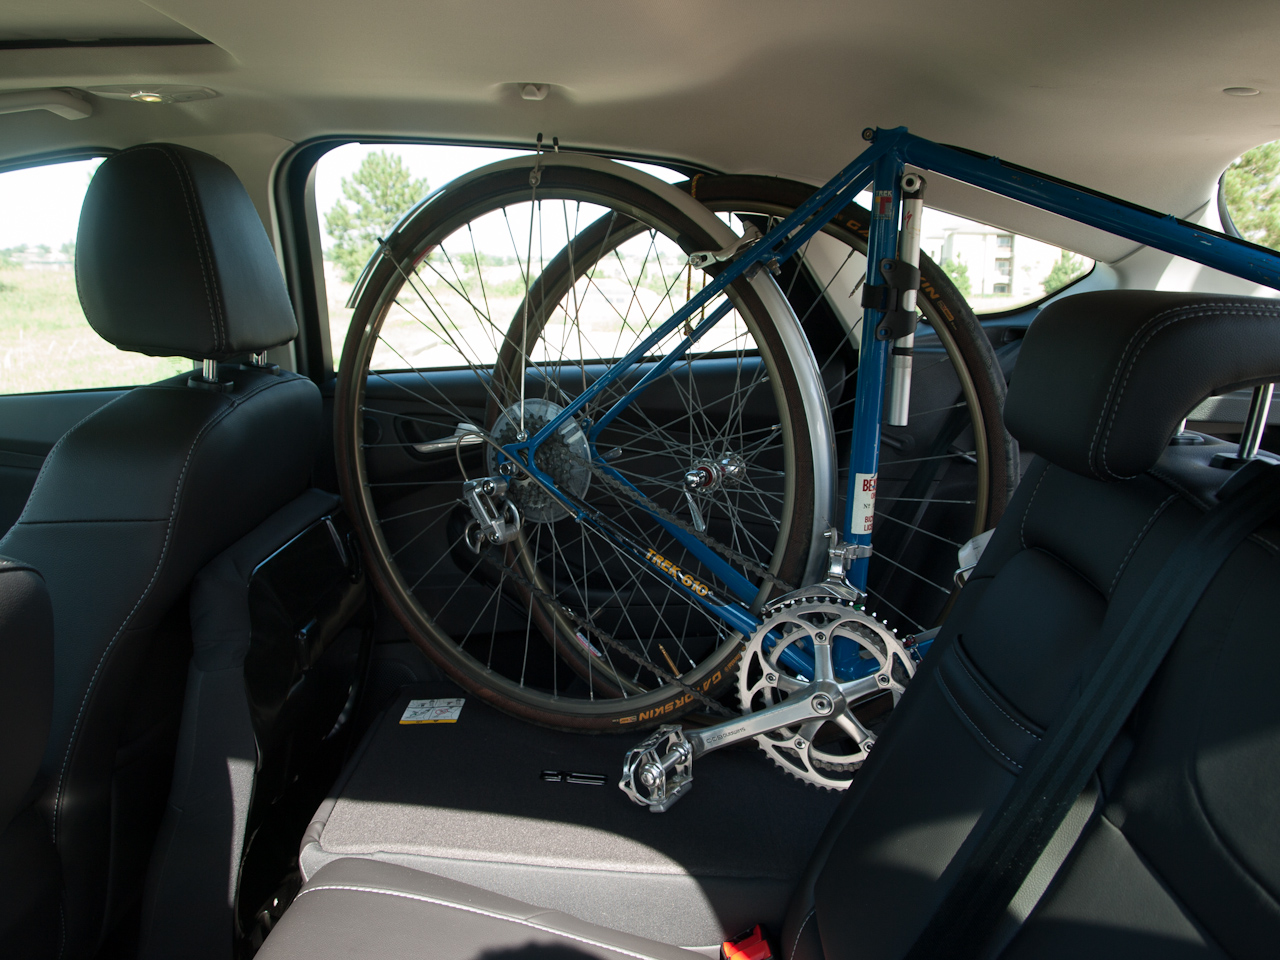
I started testing bike fit when I got home. A few test arrangements (and unfortunate grease marks on the ceiling of my car) later I had a workable solution that required removing only the saddle and the front wheel of the bike. I did some test loading and unloading and I can get the bike unloaded, assembled, and ready to ride in a couple of minutes. I can prep the bike and get it loaded back in the car quickly as well.
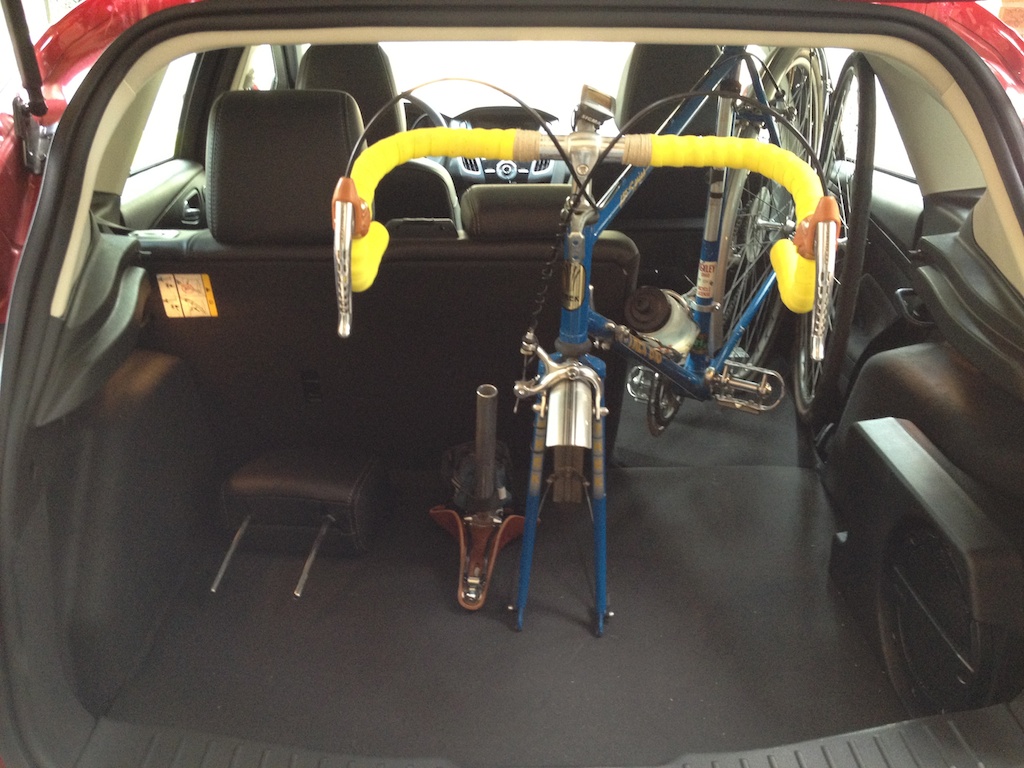
The key to loading the bike turned out to be to fold the passenger side of the rear seat flat (the narrower half of the split seat), and to temporarily fold seat back of the driver side as well. The bike can then be rolled at an angle into the cargo area rear wheel first. The angle (tilted down about 45 degrees) allows the rear of the frame to clear the hatch opening, and once clear the bike can be tilted back to vertical and the larger side of the rear seat placed back upright.
After working out the test fit, the next step was to build something to properly anchor everything and keep the bike from damaging the interior of the car. The primary anchor had to be the front fork, with the rear wheel anchored by it’s location in the gap between the folded rear seat and the door. Realistically the only thing I needed to build was a front fork mount.
Designing the fork mount
The tricky part of designing the mount was that I didn’t have a lot of clearance between the rear window of the hatch and the bike’s handlebars. A simple fork block mounted to a set of 1x4s would raise the handlebars too far off the floor. After some thinking, I sketched out an idea for mounting a fork block horizontally to the side of a piece of angle aluminum. This would minimize the rise of the fork mount above the floor of the trunk.
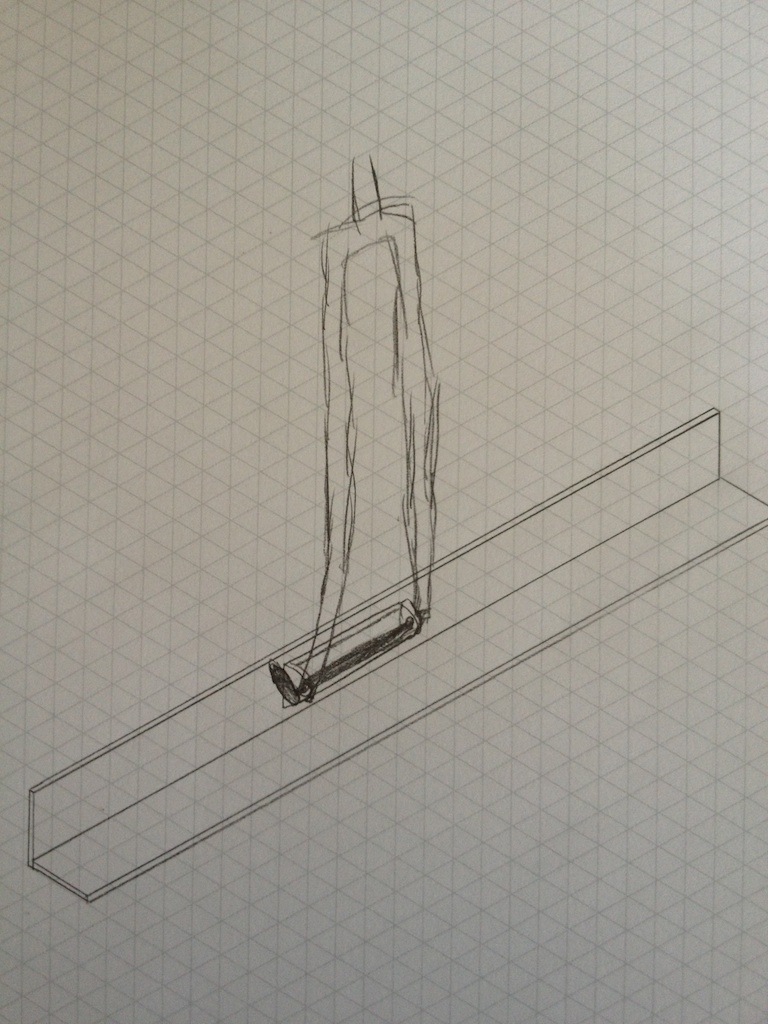
I picked up a fork block at the bike shop, then headed to the hardware store for the rest of the parts. The primary assembly is simply the fork block mounted to the side of angle aluminum. I finished it off with nonslip shelf liner to protect the interior of the car from the sharp metal edges and to keep it from sliding around on the floor of the car.
Parts list:
- Basic fork block from the local bike shop. These are widely available and are really just a metal bracket with a quick release skewer and mounting holes.
- Angle aluminum, 1.5 inches by 3 feet, 1/8” thickness. The main body of the mount. The width of my trunk where the bike fork sits is 37 inches from wheel arch to subwoofer. The 3 foot section of aluminum is just about perfect. The 1/16” thickness was too easy to twist, but the 1/8” was nearly ideal.
- Bolts. I bought a small bag of short 1/4” bolts and nuts that fit the holes in the fork block and wouldn’t extend much past the angle aluminum and fork block.
- Nonslip shelf liner. I got a roll of standard black nonslip shelf liner to both pad the aluminum, making it safer for the car, and to keep it from sliding around on the floor of the trunk.
- Heavy duty mounting tape. I used a roll of outdoor mounting tape to secure the shelf liner to the aluminum bar. I think most any adhesive would do.
- Miniature bungee cords. These are to secure the front wheel to the bike frame and to mount the seat between the fork blades. I am thinking about switching to velcro straps.
- Drill and bits. Technically tools rather than parts, but necessary to drill the mounting holes in the angle aluminum.
Not including the drill (which I bought a couple of years ago for my garage wall mount bike rack project), the total cost of parts was about $60.
Construction
Construction was straightforward. I first started by loading my bike into the car without the fork mount, and tried to find the optimal position of the frame and fork for clearance of all bike parts from the interior and easy closing of the liftgate. I placed the angle aluminum under the fork, and centered it between the wheel arch and the subwoofer. I then placed the fork block into the fork and verified that the position would work, and marked the location of the mounting holes.
Drilling the holes was largely straightforward, but I had to do it twice. I had marked the holes with permanent marker but had not been careful about cleanly covering the outline of the fork block. Because of this my holes were about 1/8” too far apart, and the fork block had no horizontal forgiveness in the design. I moved the block slightly and re-drilled the holes more carefully, and the second time things mounted fine. I didn’t really mind, since I don’t get enough opportunity to use my nice cordless drill and this was a good excuse. I finished the edges of the drill holes with a small grinding bit on my dremel.
The fork block was bolted to the inside of the angle aluminum (though the outside would have worked as well), and in this configuration the mount point for the fork blades is only about 1/2” above the floor.
Once I verified the fit of the assembly, I pulled it back out of the car and wrapped the outside of the aluminum in the nonslip shelf liner. This probably took the most time of the whole process, but most of that time was fiddling with the tape I bought. I probably should have used a different type of tape, but it’s done now.
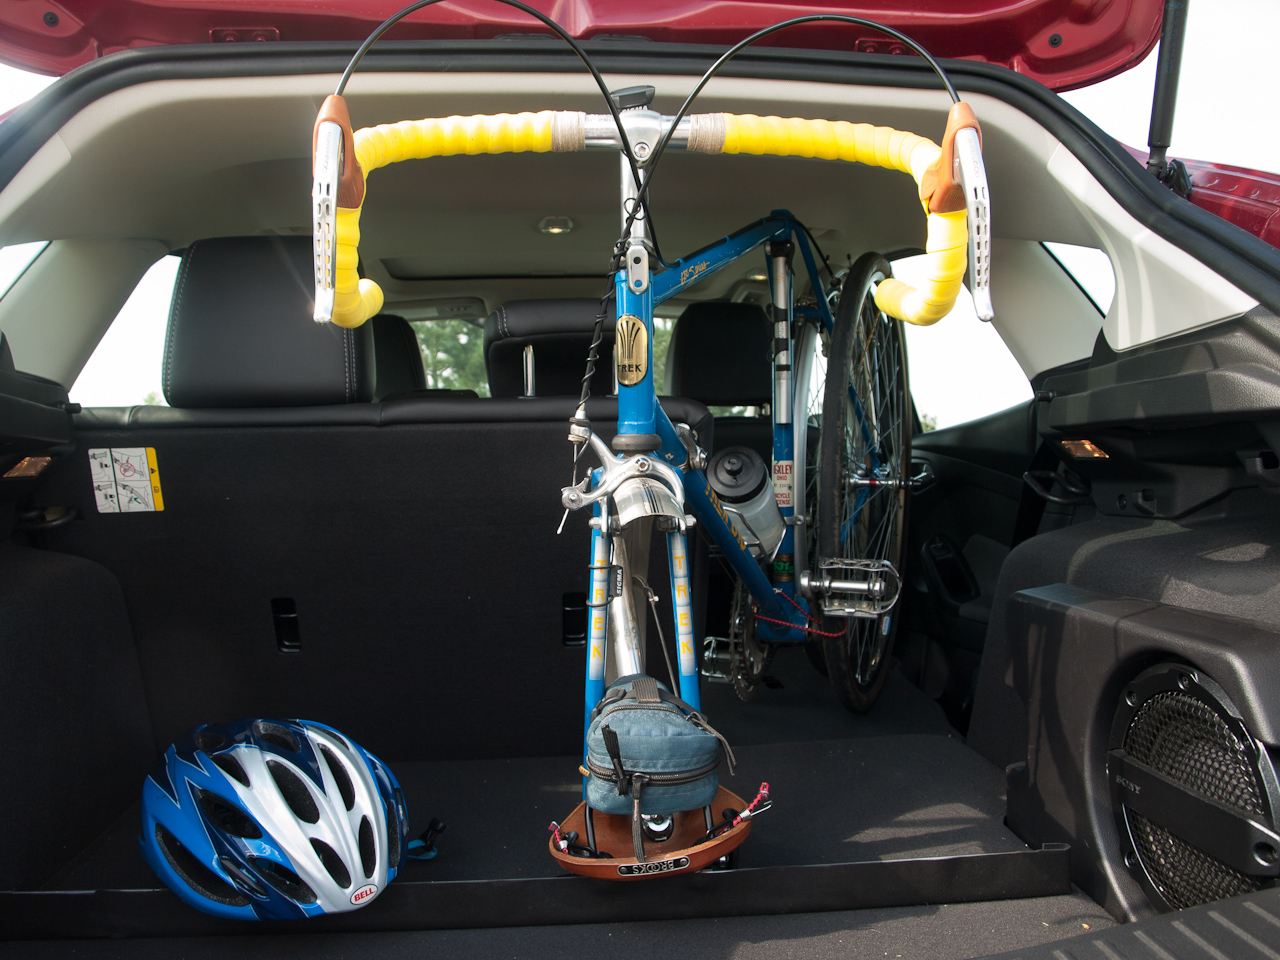
The finished product
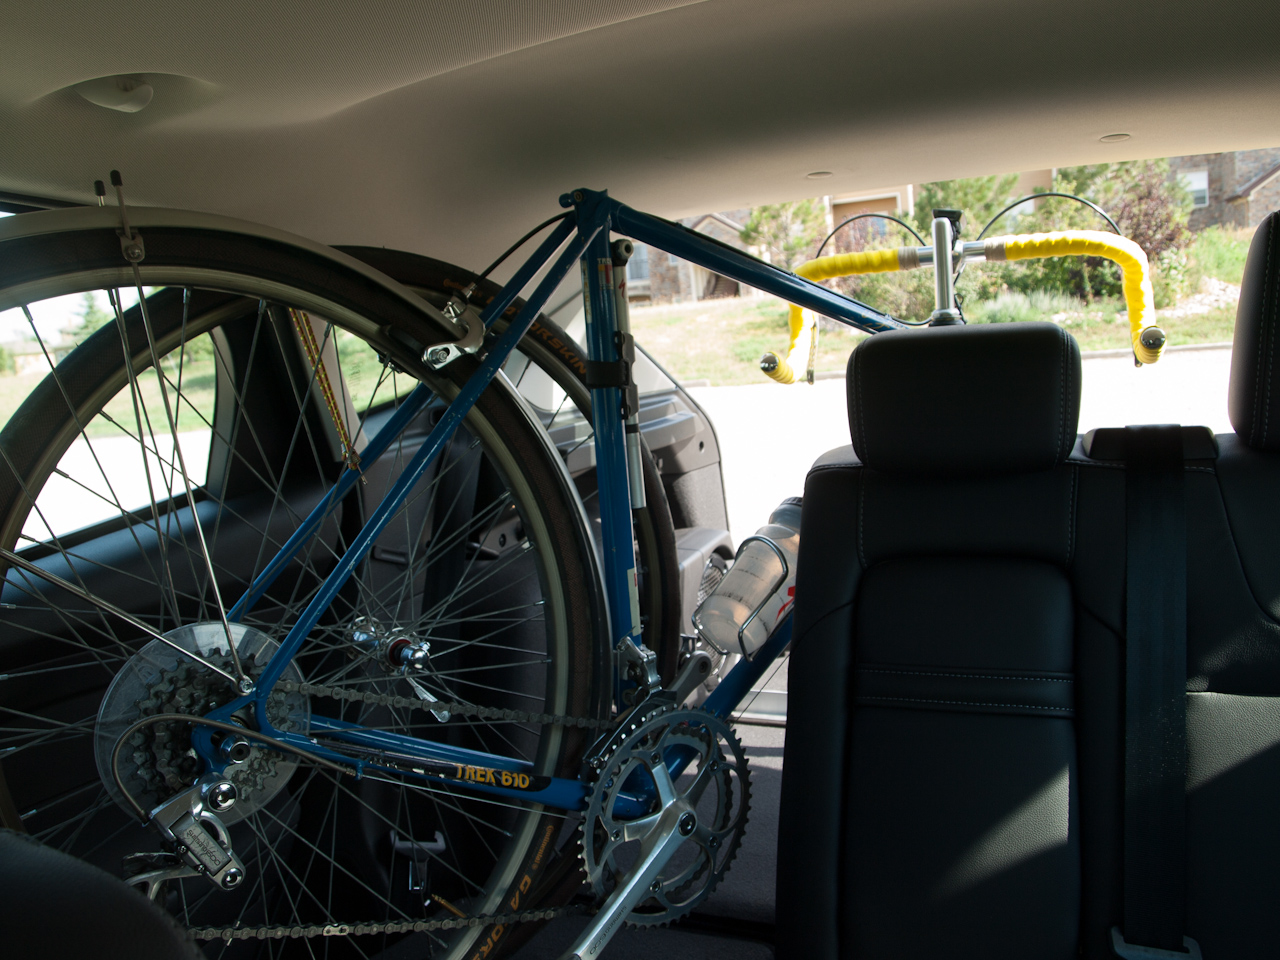
The finished fork mount is extremely simple. It’s essentially just an off-the-shelf fork block bolted to a short section of angle aluminum. It solved the problem though. The front of the bike is held securely in place to the aluminum, and the mount’s length and the nonslip finish keeps the bike from tipping or sliding around. The rear wheel is held in place by the friction of the tire and its position between the door and the rear seat cushion. Even spirited driving around town didn’t shift the bike around. I lose some luggage space, of course, but not a lot, and this will let me easily bring my road bike with me on road trips without hurting my gas mileage or damaging the bike.
What about two bikes?
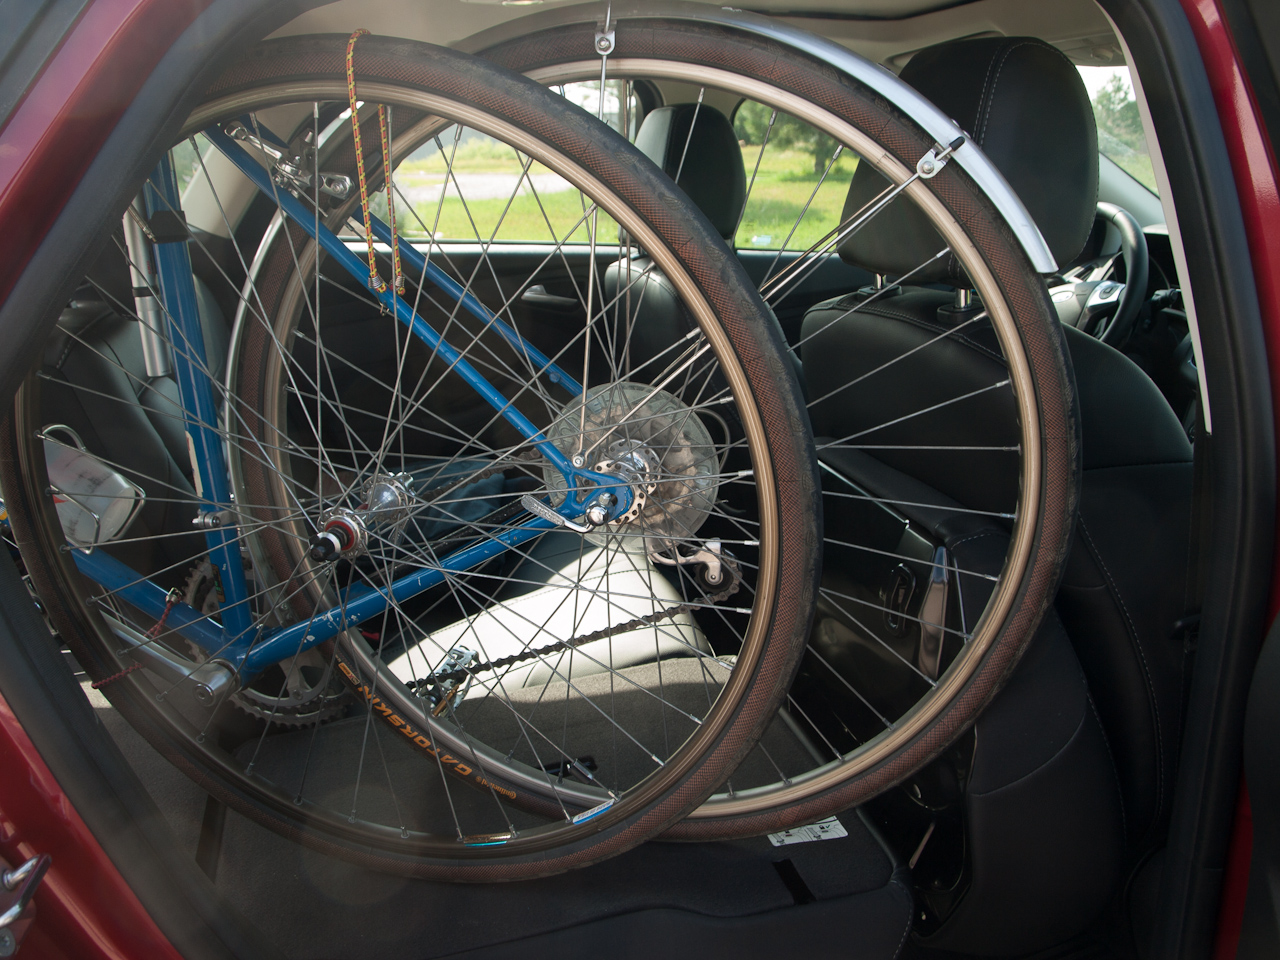
Because the car is not long the bike has to sit at an angle as the photos show, with the rear wheel at the outside of the car and the fork blades toward the middle. My handlebars are also relatively wide. In the current configuration it would be difficult to load two bikes side by side.
I think it would be possible to load two bikes at a time by building a second set of mounts (or even placing two fork blocks onto one mount), but this might require removing or otherwise turning the handlebars of both bikes. Another option may be to mount the second bike “backwards”. I might test these possibilities at another time, but my primary goal was to be able to easily bring my road bike with me on trips, and I have accomplished that goal.
Why I wrote this
More than anything, I hope this (admittedly crude and simple) mount option will be useful to owners of the 2012 Ford Focus hatchback and other similar-sized hatchbacks such as the Mazda 3 and Subaru Impreza. The basic concepts might even be useful to those with larger vehicles. It strikes a good balance between preserving seating and cargo space while minimizing the bike disassembly required to use the rack. Loading a bike can be accomplished in 5 – 10 minutes, start to finish. It is very light, has only one moving part, can be hung on a nail on the wall of the garage for storage, and it was easy to build.
— Steve
-
You have to say it in your head like Merlin would on Back to Work to really get it. ↩
-
There’s never no worry about theft. ↩
-
Andy actually made cardboard bike mockups that he took to dealers during his shopping process to check fit and make sure whatever he bought could take two bikes minimum. ↩
Posted on 16 July 2012